Showing posts with label garden soil. Show all posts

Sunday, May 10, 2009

Preparing New Raised Planting Beds

My new raised bed frames arrived from Natural Yards on Friday, just in time for the weekend. This year my garden supplies include two 4 x 4 raised bed frames, a 4 cubit foot bag of sphagnum moss, a 4 cubic foot bag of vermiculite, 1 bag of composted manure and two compost 50 gallon bins worth of composted yard clippings. I also purchased a 100 foot bolt of weed barrier cloth and 10 bags of rubber mulch. The rubber mulch is made from recycled materials and is supposed to last many years.

My soil recipe is 1 part compost, 1 part vermiculite, 1 part sphagnum, 1 part soil mix from last years garden and 1 shovel composted manure. To make it easy to mix, I added 1o shovels of my composted yard clippings, 10 shovels of vermiculite, 10 shovels of sphagnum, 1 shovel of composted manure, and 10 shovels of the mix from last year's garden. I put all of this into my wheelbarrow and mixed it in the wheel barrel. Then tipped it into my garden bed. It took four wheelbarrows per 4 x 4 bed.

The 4 x 4 beds have three feet in between each bed. I had enough soil-less mix for four beds. The trick in the plan is that I had to disassemble one half of my last year's bed which was a 4 x 8 foot bed, four boards high.

The first step my husband Brian and I did was to figure out how long the garden-bed row would be and then laid down the garden cloth. Then we removed the top two rows from last years bed.
We measured the distance from the farthest half of last year's bed to include a four foot bed, three feet space in between and then another four foot bed and three feet. So we started building the first new 4 x 4 bed ten feet away from where the near-side of the old bed that would remain. We had to leave the 4 x 8 bed intact until we assembled three beds so that it could hold the planting mixture.

Once the three beds were assembled, then I started mixing up this years planting mixture based on Mel's Mix from Square Foot Gardening by Mel Bartholomew. I put four wheelbarrow's of mixture in each of the three beds. Then we scooped out one wheelbarrow of planting mix from last years bed and scooped all the mix from the half we were disassembling to the end that would remain. We began putting together the last of the five beds, but found that the ground needed to be leveled and we were running out of daylight so had to stop for the night.

One advantage of adding the planting mix from last year's garden into the new beds, was that some of the red wriggler worms I added to the bed last year were transplanted along with the planting mix. I was so encouraged to find the little guys. I wasn't seeing them at first. They had migrated over to the sides and bottom of the garden bed. I suspect they were seeking the warmth of the wooden frame. I was so happy to start seeing them as I digged a little deeper.

I hope to get the last bed in place today and to place the rubber mulch. I may hold off on the mulch because I think I may purchase some landscape edging to hold the mulch in place. I priced it on the Home Depot website last night. I looks like I will need 6 packs of edging which should run about $180. We bought the rubber mulch at Costco. It was about $20 a bag. That's pretty rich for my blood, but hoping it really will last as long as the claim! And I hope the ten bags will be enough. I think I will need to buy another bag of sphagnum peetmoss and vermiculite to finish filling the beds. Then I will be ready to plant. Yeah!

I haven't done the official talley but I estimate that I am at about $600 for this year's garden beds. The five beds will then have reached a cost of about $1000 - $1200. That sounds like a lot to me, however, these materials will last for many years. The planting mix from last year was still very usable this year. If you were able to find reclaimed lumber for your garden frames you could cut the cost in half.

We recently stayed at a lovely bed and breakfast near Herman, Missouri, Les Lavandes, where the owner, Myrta Webber, was able to acquire barn boards for free from a neighbor who was taking down an old barn on his property. The old weathered barn boards look great in their new life as a raised bed garden. Another example of a great reuse of materials. Remember the OurFriendlyEarth motto: reduce as much as possible, reuse as much as possible, and recycle as much of everything else as you can.

I expect to only be refreshing the mix each year with my own compost which is virtually free. We use a lawn service which uses only organic treatments for the lawn and we do not add any chemicals to the lawn ourselves. We water the garden with water from our rain barrles, so our garden is as close to organic as one can get in a suburban garden.

Les Lavandes Bed and Breakfast, Starkenburg, MO
Gardens at Les Lavandes B&B

Buzz it up

Monday, June 16, 2008

Raised bed frame arrived today!

The cedar raised bed frame arrived today! We assembled and added growing mix. Hooray!

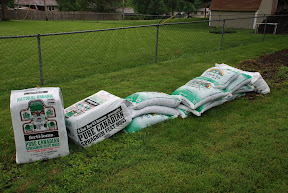
The materials are laid out and waiting: 2 bags peat, 10 bags cotton burr compost, 1 bag of vermiculite, garden weed shield cloth, and raised bed frame in boxes.

First I cut two pieces of weed shield cloth, 10' long. The width of the cloth is about 3'. I overlapped the cloth several inches in the middle and laid two boards on either end to keep the cloth from blowing up in the breeze while we plotted out the assembly of the frame.

Next, we stacked the boards around the cloth in the places where they would be added to the frame. Remember, I bought the economy boards so we sorted them and arranged them for best appearance, placing blemishes toward the inside of the bed.

My faithful garden helpers, Max and Michelle were right there with us!

My husband Brian was a great help! He brings brains and brawn to the work effort!

Note the steel rods inserted in holes at each of the four corners and middle which are used to secure the frame. These will be hammered down with a rubber mallet once we have all the boards in place. The great thing about a Natural Yards frame is that you the only tool you need is something to hammer the rods down and many people simply use a big rock to do that.

The frame is constructed four 5-1/2' layers high. There are two aluminum support beams placed on top of layer one and the other on top of layer three. These keep the middle of the frame from shifting.

We layered the growing medium ingredients in the frame. I started with five bags of cotton burr compost then one bag of peat and mixed those two ingredients together. Next I added 1/2 of the vermiculite. Sort of like mixing the dry ingredients for a cake, I stirred this with a hoe until well mixed and then repeated with the rest of the ingredients.

After all the "stuff" was added, you can see that the soil-less mix is about two boards shy of the top of the frame. I do need to leave some space for the displacement that will be caused by the plants and also room to add mulch, however, it seems a bit short.

The height of the frame will definitely keep the dogs out, and will be more cost effective and space efficient than putting a fence around the garden, but may be overkill. I am considering removing the top layer and creating a 4' x 4' bed. I have enough boards to build it two layers high so I would probably order a single-layer 4' x 4' bed and request steel rods long enough for a 16" high bed.

Since all the boards for my current bed are 4' long, next year I may re-assemble the bed into two 4' x4' beds. Then I would have 3 beds of that size which would be a nice configuration.

Sunday, June 15, 2008

Growing mix is ready and waiting!

Compost Bins


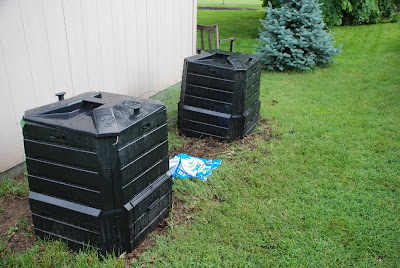
On Saturday evening I lifted the bins from the compost and turned it out. The compost in one of the two bins wasn't nearly broken down enough. The second bin was better and close to becoming good compost, but still not quite ready. I went back to ACE and picked up two bags of composted cow manure ($3.21) to mix in with my home compost. We gathered up clippings my husband had been dumping under the lilac bushes then we layered the dryer compost, then forked in some manure and then a layer of the greener clippings and the more composted material. We continued the layers until both bins were full again, then I hooked up the hose and watered both bins well and recapped them.

When I went out late in the morning today and checked, the compost had really heated up. The bins were hot to the touch without being in direct sunlight. The spot I have them is on the west side of our garden shed so they don't get direct sun until after one or two in the afternoon. So, the yard waste that had been in the bins for two years making really, really slow progress is now on the way to becoming rich compost probably in a matter of three to four weeks.

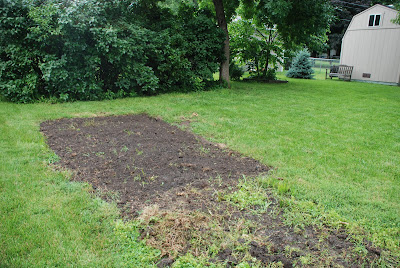
My garden plot, just waiting for action!


I decided to call Suburban Lawn and Garden, a local nursery across town to see if they had vermiculite. Ace didn't carry it and the garden center a mile from home, Family Tree Nursery didn't have it either. When I called Suburban, I asked for someone who could give me advice on soil amendments which put me in contact with a fellow who was willing to listen and give me some really helpful advice.

He felt that 1/3 vermiculite was a bit too much so we did some mental math for the size of my garden and came up with the following combination: ten 2 cubic feet bags of Back to Earth Cotton Burr Compost ($49.90), two 3.8 cubic feet bags of Canadian Sphagnum Peat ($27.98) and one 4 cubic feet bag of vermiculite ($16.99). I also bought a 3' x 50' garden weed barrier cloth ($19.99). It's a lot more cloth than I need for my single bed, but the next smaller size, 3' x 20' was $12.99 so it was a better value and I will use it on other flower beds around the yard with plenty to spare for the addition of another 4' x 8' bed I will most likely add next year or maybe even this fall.

The current accounting

My total for growing mix and the two bags of manure I layered in with my compost, the garden frame from Natural Yards, (I bought the economy boards which may come with some less than perfect but still durable boards, and it saved me 15%), is $577.13. About $80 more than I had estimated for the bed with growing mix.


To recap, the garden frame is untreated cedar and is 4' width x 8' length x 22" high and will have 32 cubic of soil mix. This is less than the actual volume that the frame could hold,but looking at the stack of bags waiting out by the garden, it looks like it ought to do the job. I have another 24 cubic feet of homemade compost cooking in the bins which will be added later and once I have the plants in place I will be top dressing with mulch.

The garden frames come in heights of 5.5" increments. The main reason I went with a four-layer frame was to gain enough height to discourage my two faithful Basset hounds from jumping into the bed and digging around. Max, the "big dog" of the two, has already enjoyed helping me dig up the weeds to prepare the bed. He had a great time!


Michelle is the female half of the Basset duo. She is not as interested in digging at this point.


Max is 6 years old and Michelle is his 2 year old child bride. They are quite a pair.


What still needs to be purchased

I still have the soaker hose and of course, the veggies to purchase. I also need mulch and a can of worms. That's right! Good ol' night crawlers. The associate that helped me at Suburban told me they had no worms, but I could buy composted worm castings. I told him I want my own live wormy pets in the garden! You have to add worms because the weed shield cloth that will be placed under the frame and growing medium will keep worms out as well as weeds. A quart bucket of worms introduced into the garden will provide perpetual worm casting which is great fertilizer for the garden. The worms will multiply and make their happy home and nourish the garden bed as well. The fellow at Suburban Lawn and Gardens told me to try a fish bait shop.

I am paying for this from my paycheck, but my husband was curious as to whether I had compared the cost of prospective produce from the garden to what we may spend at the market. Honestly, this year, I will be lucky to break even but there are all the other intrinsic values to count such as the known therapeutic benefits (I have a high-paced, stressful job...I need this! At $100 per counseling session this is a bargain, right!) and the better ability to deal with our yard and kitchen waste. Plus the experience I will have learning about gardening and then sharing all of that with you, my readers. Next year I won't have the same start up costs, unless I add a second bed. If the dogs are good and stay out of the garden, I may be able to simply break my current bed into two 11" high beds. I checked with Natural Yards and they will be able to sell me a second set of steel pins which are used to hold the bed frames together.

I knew this would not be the cheapest way to garden, but with my work schedule of 48 plus hours per week, I need a gardening method that promotes simplicity. Although preparing the bed was a bit of work, I didn't have to rent a tiller. The raised beds are supposed to make caring for the garden much easier. Hunting down the growing mix components took some doing and luckily I have a big strong husband to help lug all the heavy bags.

If you are doing this on your own, you could most likely have the bags of growing mix components delivered and you could consider hiring a teen from your neighborhood to help lug the bags, set up the frame and add the mix. Once all that is in place, the going should be a breeze. But stay tuned!

One more tip. Check with your local library to see if they have some good gardening books. I found that our library, Johnson County Library has Mel Bartholomew's latest book on Square Foot Gardening. JOCO Library has a great website and I am able to reserve books online. I am number 3 on the wait list. I will try to be patient. I may end up at Borders. After all my gardening costs...I need to save the $24.95! Patience!

Saturday, June 14, 2008

Still Waiting for Garden Frame!

I was expecting to come home from work on Friday and find boxes of cedar from Natural Yards, only to find they had arrived at the FedEx hub but would not be delivered until Monday. I called the FedEx 800 number to see if they had a customer pick up option but was told by customer service that my boxes were in a container and that they would not dig through the container just to find my four boxes. I had to wait until Monday. The customer service rep was a bit snippy so I was a bit ornery and I asked nicely, "So you don't have a customer pickup service like UPS does?" "NO! We don't!" (Darn!)

So back to planning stage. I have weeded my bed area. I calculated the cubic feet of dirt that I need. My bed is 22" x 4' x 8' so divide 22 by 12 to get the feet in decimals for height (1.833), multiply 1.833 * 4 * 8 = 58.56 cubic feet of growing medium.

I am considering get 20 cup hooks or eye screws to attach to the inside top of the frame on one foot intervals so that I can string twine over the soil through the hooks to create a grid of 1 foot squares (Square Foot Gardening). I will need garden cloth to lay down on the ground first. Then the bed frame is constructed. Then fill with the growing medium. I will most likely cover the growing medium with more garden cloth to keep out weeds, then add a soaker hose and mulch.


*********************************
Shopping for Soil

Just got back from shopping for soil mix for the garden frame. It seems that the best price I can get for a soil mix is $5 a cubic foot which would be about $290 total. That was a Miracle Grow soil mix for flower and vegetable beds. More that I want to spend. So I am back to the computer searching to see if there are any nurseries that will sell a soil mix by the cubic yard and deliver it to my house. We shopped first at Ace, then we stopped by the neighborhood nursery that is great but pricey. Their soil mix was a couple dollars more per cubic foot than ACE and they didn't know of anyone that would sell a soil mix by the cubic yard.

The ACE experience

My first stop was at ACE where a young man working the lawn and garden department first told me the broken bags of soil would be half off. So I got my hubby out there and we dug through the pile of broken bags to see what they had and count it out by size of bags since they were mixed. I added up a total of about 14.5 cubic feet of soil and took an average price of $2.5 per cubic foot to come up with a total of $36.25 that I would be willing to pay to take the broken bags. This would be about half price.

I hunted down the manager who first of all told me that the broken bags were only 20% off not 50% because the bags hadn't lost any soil, people had simply put their hands through the bags. I told him that I had sorted through the broken bags and had the ones that I wanted. And that there was soil on the ground around the bags, by the way. In the game of "Deal, No Deal" he was all NO DEAL and he had NO patience. So I said, OK, let's figure out how much the odd assortment of bags will cost at 20% off. They didn't have all the prices for every size at the register which didn't help the manager's mood one bit but a clerk was able to work with me and we figured out the total for the one 2-cubic foot bag, five 1-cubic foot bags and five 16 quart bags. They wanted $65.35 at the discounted price. Wow! Too much! The manager had made himself scarce at this point so I said, "Thank you! Now I know how to compare prices."

I always think you should try negotiating a good price when you are talking about buying damaged merchandise. Not only had the bags lost some soil, we had a heavy rain two nights and the bags were somewhat water logged. Very often store managers will work with you. This guy must have been having a hard day. I guess if I was stuck working hardware on a hot muggy Saturday I might be grumpy. Still think you should always be polite to your customers! You never know, they might just have a blog! "Ace is the place with the helpful hardware man." Just not a helpful lawn and garden man. :-)

*********************************
Back to Mel's Place

After the ACE experience, I went back to Mel's site, Square Foot Gardening, and I very pleased to see that I don't really even need soil! What I really need is peat, vermiculite, and compost. I knew I needed vermiculite and peat, but couldn't remember if the third component was soil or compost. My brain is either my computer or a piece of paper...and I hadn't written this down. Ace didn't have vermiculite, but they did have a good price on peat, 3.8 cubic feet at $5.99.

I picked up a local gardening paper at Ace where I found information about the Master Garden program in the area. They have "hot-line" numbers for gardeners and you can email. Cool! Maybe I can get some help on the best place to get the vermiculite and compost. I also found an ad for Suburban Lawn and Garden, a local garden center that appears to offer soil and soil amendments in bulk so I am getting closer to the goal!

I feel that I have to get the bed up and planted this week. We take a week-long vacation in July and I want my plants to be well established before we leave town.

I do have a couple of full compost bins, but since I haven't gardened in a couple of year, they bins have been full but not turned enough to really cook the compost and break it down. I am considering turning it out on my garden area and turning it in with the soil to be the base for my raised bed, then put the 3-part mix that Mel suggests on top. I am going to try that this evening...now that the sun is lower in the sky and we have some shade out back. If it works, then I will only need half as much mix.

Food, Nutrition, Gardening Blogs